Welcome to your first module! This guide will walk you through installing and activating XLBuddy. In just a few minutes, you’ll have our powerful tools ready to go right within Excel.
First, you need to download the installer file from our website. Click the download link from your trial request or purchase confirmation email. Your file will be named something like XLBuddySetup(version_number).msi.
Please be advised that upon downloading, some web browsers (e.g., Google Chrome, Microsoft Edge) may display a security notification indicating the file is "not commonly downloaded." This is a typical behavior for new software versions that have not yet established a large download history yet. If you are not sure if the installer is legitimate or not, please right click on it and go to the Properties > Digital Signatures. There you will see that it was signed by us, XLBUDDY PROSTA SPÓŁKA AKCYJNA, with date when it happened, which is a final and ultimate proof that the add-in comes directly from us. If that is so, you can proceed with installation.
Downloads folder and double-click it to run. You may see a Windows security prompt asking for permission; please click “Yes” or “Run” to continue.When you first run the installer, Windows may display a blue pop-up from Microsoft Defender SmartScreen that says, “Windows protected your PC.” like the one below:
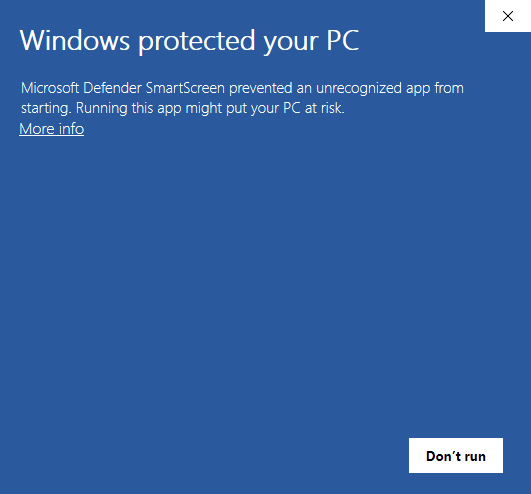
This is a built-in safety feature that appears for new or unrecognized applications. Because our software is new, SmartScreen might show this warning as a precaution. To continue, simply click the More info link within the pop-up. Afterward, a new button will appear at the bottom labeled Run anyway.
Clicking this will allow the installation to proceed normally. We can assure you that we did our best to ensure our application is safe, we digitally signed it, and this is a standard step for newly released software.
Now that the installation is complete, let’s make sure the add-in is active in Excel.

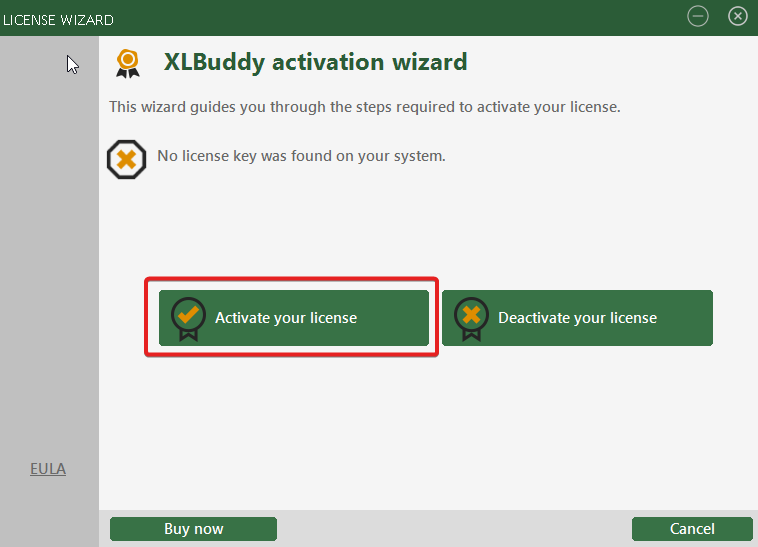
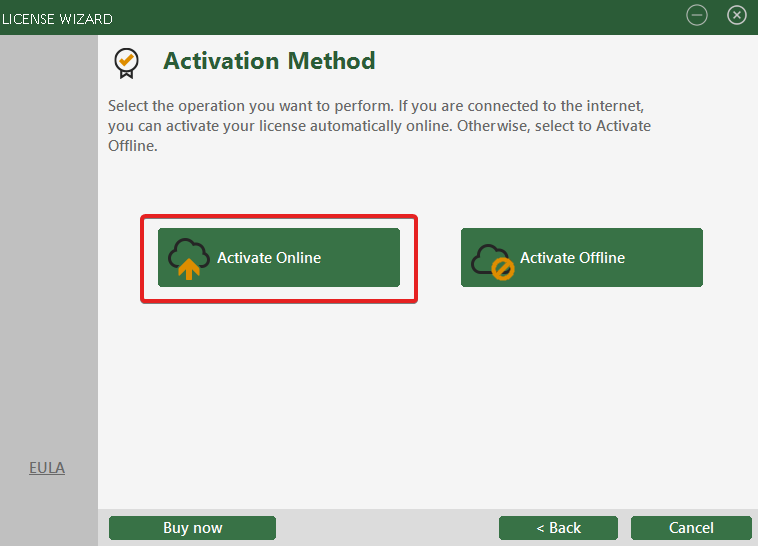
The final step is to activate your license to unlock all the features.
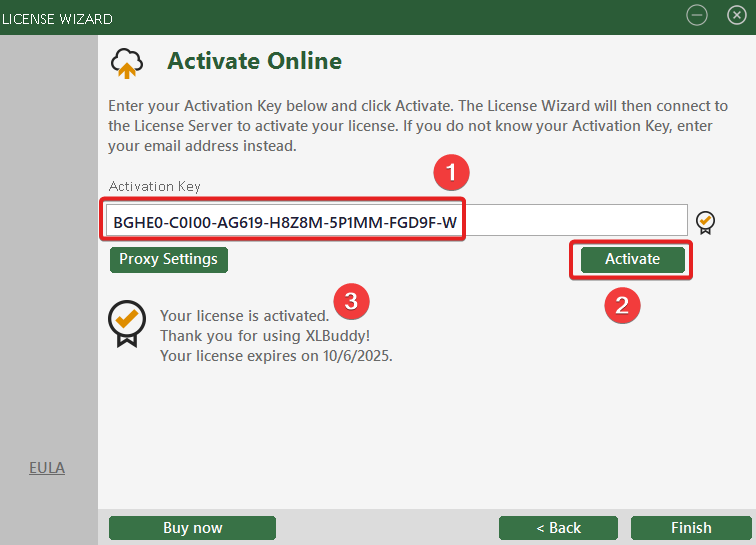
You should see a success message confirming that your license is activated. Congratulations!
If you don’t see the “XLBuddy” tab after installation, it might be disabled. Here’s how to enable it manually. We recommend going from Solution 1 to 3 – which one will work depends on your specific IT environment settings.
Potential solution 1 – auto-disable after installation
Excel might automatically disable an add-in if it suspects it caused a crash or slowed down the startup process. There are a few places to check if your add-in is in this state.
Potential solution 2 – Trust Center issues
Excel’s Trust Center has security features that can prevent add-ins from loading, especially if they are downloaded from the internet. Here we have three potential solutions:
2.1 Unblock the add-in file:
2.2 Add the add-in’s location to Trusted Locations:
This will add the add-in installation folder as “trusted source” on your computer.
2.3 Disable option to run new add-ins – the last resort
Our add-in files have been signed with an EV code signing certificate from a well established Certification Authority. You can verify the certificate by right-clicking on the main project .dll file:
C:\Users\YourUserName\AppData\Local\XLBuddy\XLBuddy.dll
Go to Properties > Digital Signatures – there you will see it was signed by us, XLBUDDY PROSTA SPÓŁKA AKCYJNA, with date when it happened, which is a final and ultimate proof that the add-in comes directly from us.
You’re all set! With XLBuddy installed and activated, you’re ready to start creating your amazing reports and saving tons of time doing so! In our next module, we’ll dive into our first major feature: custom visuals.
We hope you found what you were looking for! If your question wasn't answered here, or if you need more personalized assistance, please feel free to contact our friendly support team here.