This section describes how to quickly customize the XLBuddy’s behavior using a system of Styles and Scenarios. It’s designed to help you switch between different visual configurations with a single click.
Your settings are organized into Styles. Think of a style as a container holding the settings for your visual elements (charts, tables, comments, highlight etc.). XLBuddy has five Styles built-in, which you can customize to your liking and switch between them easily.
In addition, each Style consists of four predefined, functional Scenarios. They are used in the chart wizards, formatting task panes and other places. We designed it this way, so you can easily change formatting of certain elements or visuals according to your needs – all without the requirement to memorize all settings and apply them one by one manually. It is a huge time saver.
As you can easily calculate, there are total of 5 Styles x 4 Scenarios = 20 different formatting combinations available to you at all times.
By default, all Styles in XLBuddy are the same and they hold IBCS compliant formatting settings for the following Scenarios:
You can customize them as much as you want by simply tweaking some of the built-in settings or completely redesigning whole Styles or Scenarios for your brand compliance or end-users needs/preferences.
When you select a Scenario, a whole group of settings is applied at once, saving you the effort of changing each option individually. Once Style is selected, you have access to the four Scenarios for that particular Style, but you can easily change your active Style using a ribbon box:
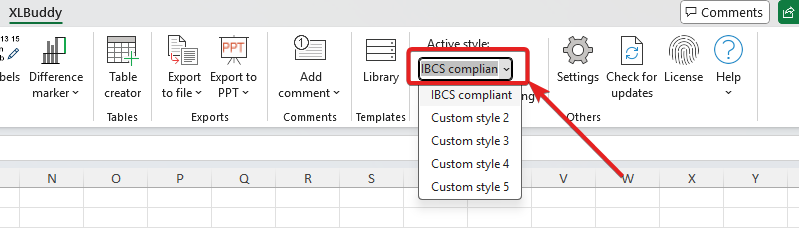
Simply choose the Style you need right now and after a click, you will gain access to the new set of four Scenarios.
It’s important to note that these Style and Scenario settings apply to some, but not all, parts of the application.
They apply to the “Visualizations” elements available within XLBuddy add-in settings, such as:
However, the split into Styles and Scenarios do not apply to the Productivity features, Shortcuts or other application specific settings. This distinction ensures that your fundamental account setup and workflow remains consistent regardless of the visual style you choose and it gives you all the benefits of the multiple visual configurations available at all times.
To access application settings, simply select the “Settings” button on the ribbon:

After a blink of an eye, a settings menu will appear:
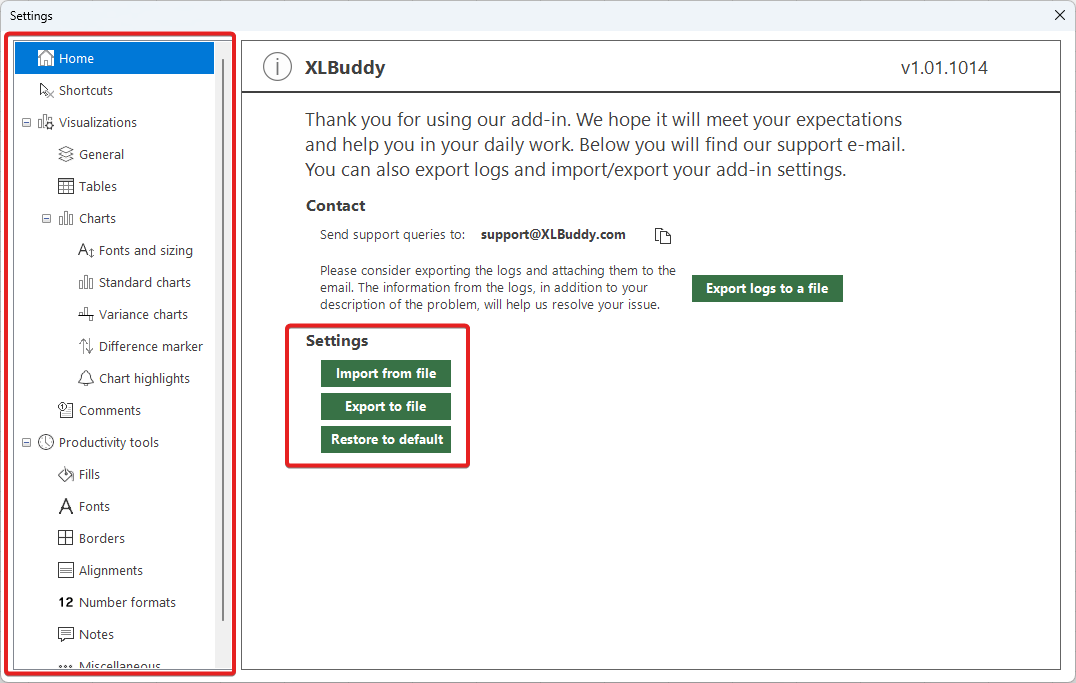
In the middle, you will find contact information and options to either import, export or restore default settings of the add-in.
On the left you will see a menu with different sections. You will be able to edit:
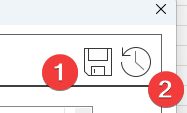
To access any section, just click on it and the settings will appear in the middle of the screen. After any changes that you make to any setting, you have to save changes using a dedicated button (1). If you want to return to the last saved version of settings, you can do it with the right most button (2):
Now, we will very briefly discuss what you can find in each settings section.
This section allows you to enable and set custom keyboard shortcuts for almost all available XLBuddy’s features:

You have over 450 shortcut combinations at your disposal. To set a shortcut simply tick a checkbox next to the specific feature, select a shortcut that you want and save your changes. It will be available to you right away.
Please note: the selected shortcut with associated feature will override any other features bound to the same shortcut. It means that if you set one of our features to CTRL + C shortcut, it will overwrite the standard windows copy shortcut.
In this screen you can also delete specific shortcuts, disable them (without resetting the associated shortcut) or completely delete all shortcuts.
These settings control the behavior of specific Styles and Scenarios that you set. You can edit them in “General tab”:
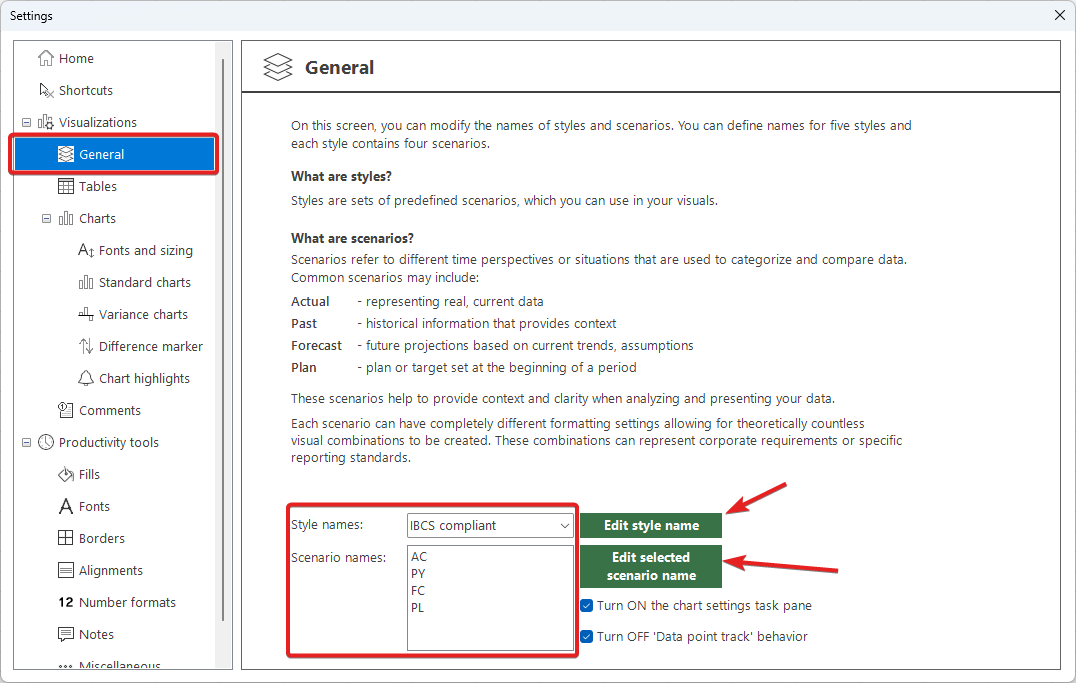
You can change your active style (for editing purposes without leaving the settings screen), and change the names of Styles and Scenarios.
In other sections, you will find various settings related to specific elements, like tables, charts, comments etc. Settings are designed to be quite self-explanatory so we will not discuss all of the options here. Please note that in most cases, when you change a specific setting from one to another (for example changing the fill pattern for your chart), the visual image will change to give you a general, rough overview of how your visual (or a particular element) might look like with your specific formatting combination:

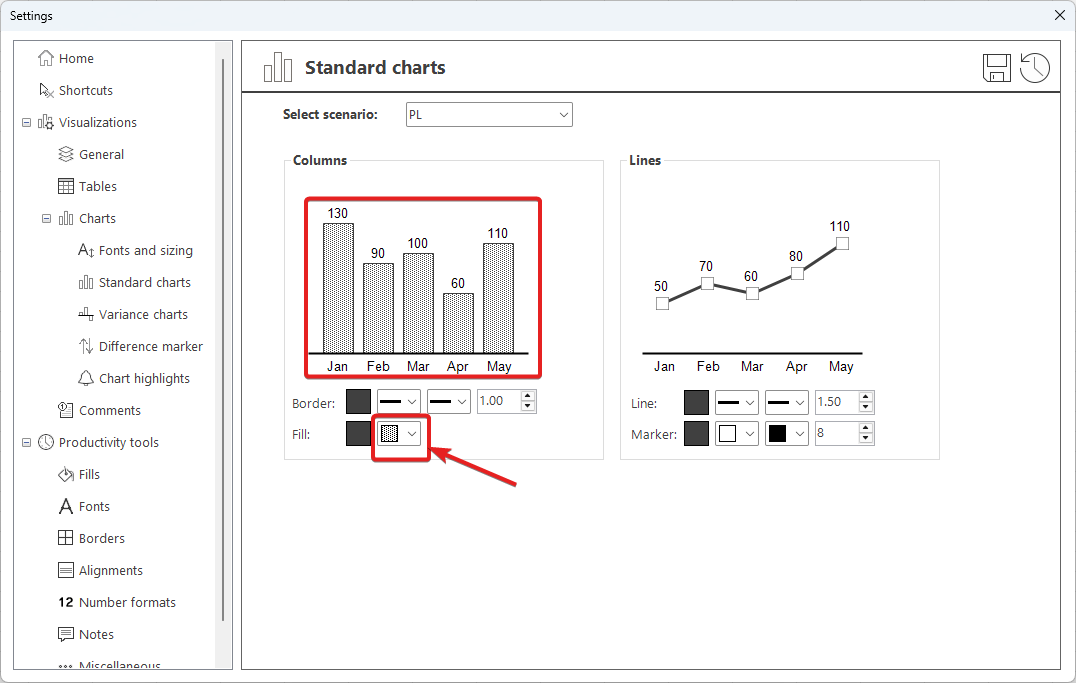
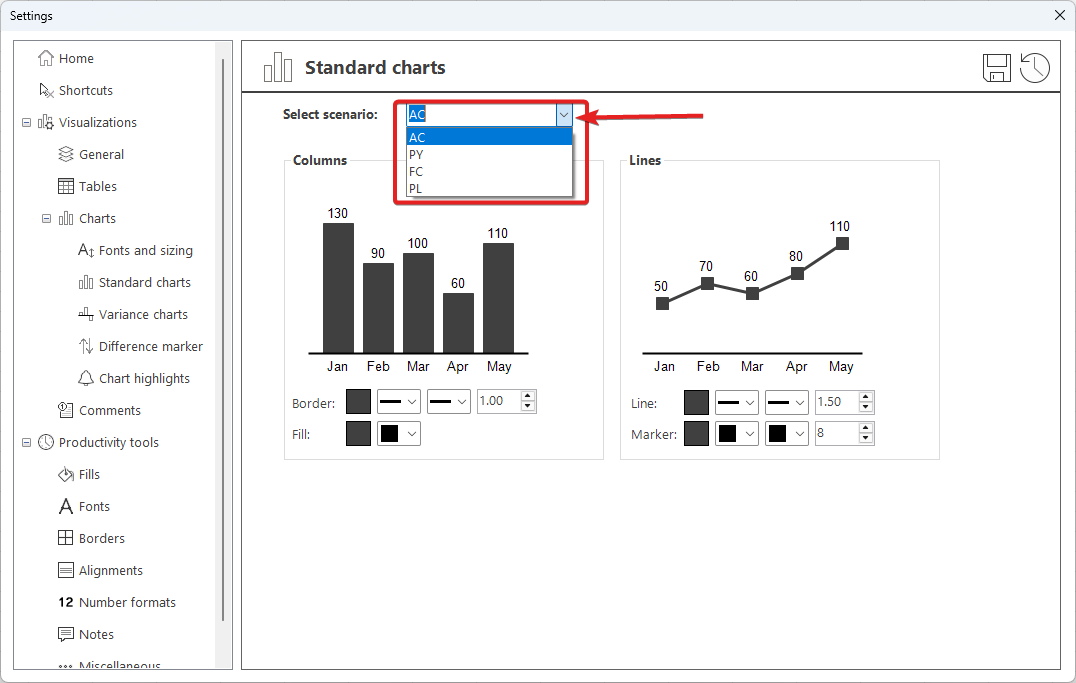
In various places you will also be able to change Scenario that you edit, while other settings (like highlighting color) are specific to a whole Style, not Scenario.
We recommend that you play with the settings, try to set them according to your needs or… Unleash your creativity and we are sure you will get a grasp of how things work in no time!
These settings are not split into Styles and Scenarios, because the associated features will be used no matter what the visual Style is selected. This section consists of various settings related to our productivity features, which are designed to streamline your faily workflow, help you in data preparation, formatting, modelling, report building and many other daily tasks.
We discuss the Productivity Tools in broad concept in Module 11 of this Getting Started guide.
We hope you now have a good grasp on how settings work in XLBuddy. You can modify some of them right away and continue tweaking the rest over time. We are sure that creating a personalized workflow will help you excel in your daily tasks.
In the next module, Module 5, we will discuss what a “Difference Marker” is and show you how to add it to your charts.
We hope you found what you were looking for! If your question wasn't answered here, or if you need more personalized assistance, please feel free to contact our friendly support team here.